


This AI Agent Writes Its Own Story
A software development experience building an autonomous AI agent using AI coding and brainstorming assistants - the benefits, challenges, and insights gained

⏭️ Skip to the next section if you aren’t interested in the backstory.
Back in about 2008, I started “this” blog as a Joomla website. Remember Joomla? Heh. Those were good times! 😅
I hosted it on GoDaddy’s basic web hosting, set up Apache, PHP and MySQL myself and configured everything manually. Data transfer was done via FTP (FileZilla!) and there was no version control in place. The blog was black, white and yellow, and named simply: IT Stuff!
Moving on – the year is 2010, and at that time Wordpress became way more popular, so I started migrating my blog to Wordpress. I’m referring to Wordpress.org – the self-hosted version I used to run at GoDaddy – and not Wordpress.com, the managed/paid version. I don’t think “managed” was even an option at the time. 🤔
Unfortunately, all my blogposts from that time have been lost… because there was a Joomla -> Wordpress migration plugin that I had misconfigured and… well, you know how it is when you don’t have version control.
It’s now 2014 and Tumblr was recently acquired by Yahoo for $1 billion. Tumblr had a nice user interface for writing content and a modern mobile app with good support for writing on the go. Tech/organizational blogs didn’t really exist on Tumblr, but I still felt adventurous and wanted to move there.
Around the same time, Medium was becoming more popular and some of the big tech companies were moving their dev teams there as well. Despite the clean design and ease of use, I never liked it because it was unclear how to migrate… but mostly because I didn’t want to support a company that tracked its readers and put up a paywall in front of them without explanation. If you want to make money writing, I’d recommend moving to Substack.
But back to my migration to Tumblr! I still hadn’t learned from my past mistakes. I tried using another migration plugin to move from Wordpress to Tumblr… 😅
In my defense, I have to say that this time I had a backup because the old blog was still on GoDaddy. The automatic migration failed (of course) and I finally decided to migrate the posts manually, one by one. This was a good opportunity not only to clean up all the useless nonsense I’d written over the years, but also to redesign and rebrand the blog. Thus, Angry Byte was born! A black and white clean design with a red accent.
It’s 2021 and like it or not, developers and techies love a nice dark theme. I couldn’t find a good way to create a good dark theme anywhere else, so I decided to start looking into creating the blog on my own. There are some important reasons why I wanted to host everything myself (once again):
With that, I decided to close Angry Byte and move the blog to my own personal domain – milos.marinkovic.xyz.

I had some important requirements for my new blogspace:
After a little research, I found that I can simply use the tools we all use every day – GitHub.
Enter: GitHub Pages. They basically give you a folder to put your entire site in, and it’s hosted for free at your-site.github.com. You get one free site per GitHub account or organization and unlimited project sites. It’s as easy as creating a new Git repository, really… so history, version control, reviews, and all that for free.
![]()
No, not in that sense. But there’s a very good substitute for a CMS with GitHub Pages.
GitHub mainly supports Jekyll, among other static website generators. I really like how these sites are laid out and how easy they are to manage. To go into a little detail… here’s how Jekyll works in a nutshell:
jekyll build
All Jekyll website themes are already set up for GitHub Pages and ready to go. Once GitHub detects a Jekyll blog in your repository, it automatically knows what to do! After you select a theme, all you have to do is add and edit Markdown documents. And it only takes 5 milliseconds to get familiar with Markdown, even if you’ve never tried it before.
The only technical knowledge you need to run a simple Jekyll blog is knowing how to edit files on the GitHub platform (which is also pretty easy).
If this got you interested, you can jump to the GitHub Pages Quickstart ⤴️.
My blog’s source code (HTML, CSS, Markdown) is also in a GitHub repository ⤴️. Note that my blog’s theme is license-protected and can’t be used without an explicit consent from the author.
And once again, it’s 3 steps only: [1] choose a theme, [2] push the site to GitHub, [3] start adding and editing Markdown files! Oh, and yes! Custom domains (such as this one) are also an option – you can configure domain routing in GitHub repository settings, next to where you enable GitHub Pages.

This material is for the advanced users. I want to share some tips and tricks about Jekyll and how I manage things locally.
If you don’t run the blog on your home computer to check, you have to git commit every time you make a change, git push those changes to GitHub, and finally wait for GitHub to build your site and deploy it to GitHub Pages. This takes forever and is especially annoying if you’re making small cosmetic changes. So much time wasted…
GitHub already provides a really nice overview here on how to run the blog on your own machine.
1 Save your website to a local directory on your own computer. You probably already have that if you uploaded your theme to GitHub. If you somehow don’t have a local copy but do have a GitHub repository… well, you did something wrong. Now you need to clone your GitHub repository to a local directory of your choice.
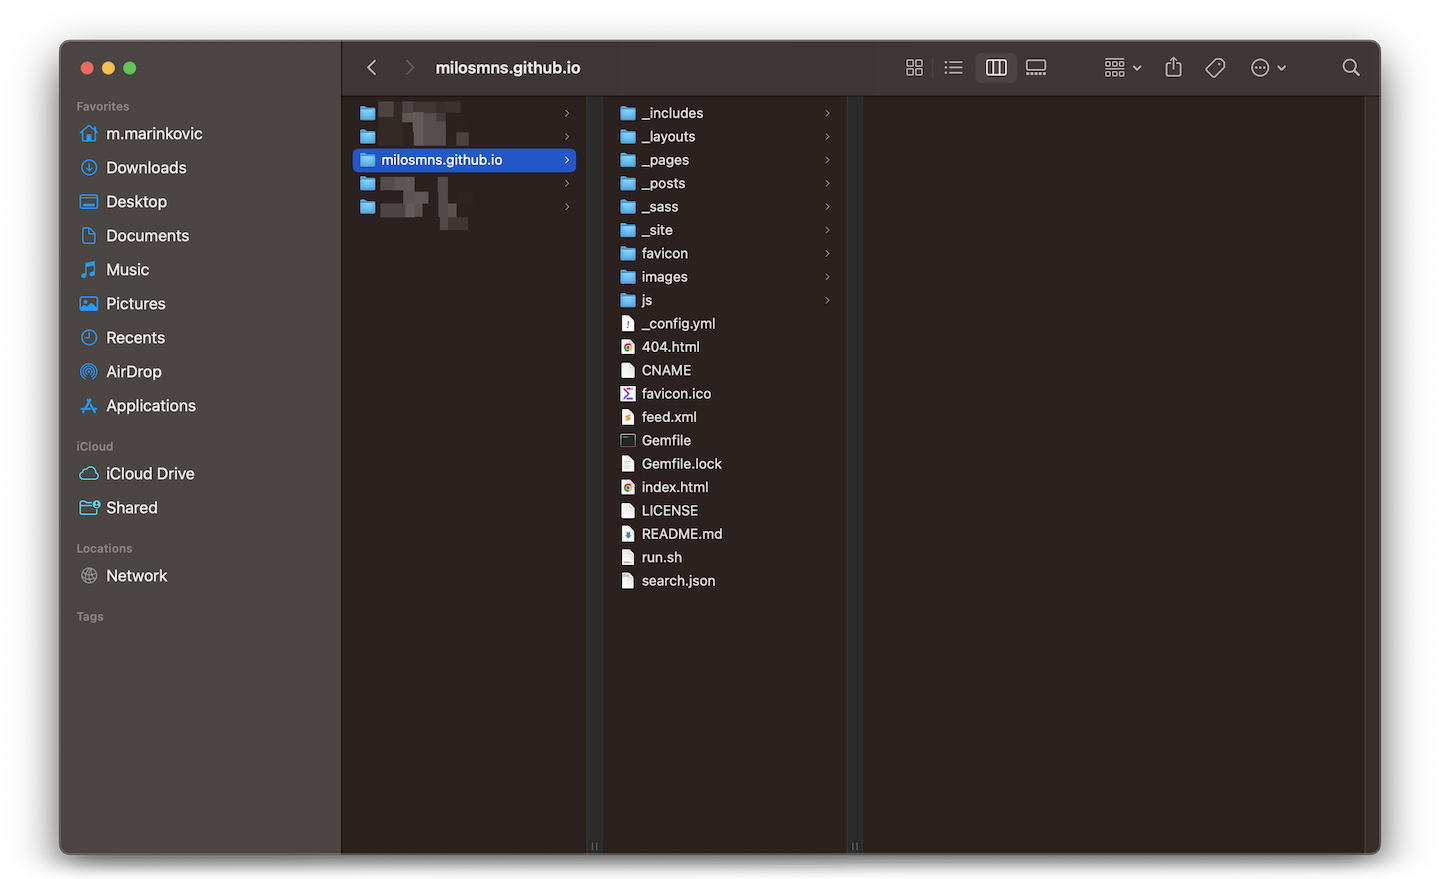 Jekyll blog on my local machine
2 Install the Jekyll engine locally. Here’s a link to some installation requirements and the installation process itself: Jekyll Installation ⤴️ – follow the installation instructions for your operating system.
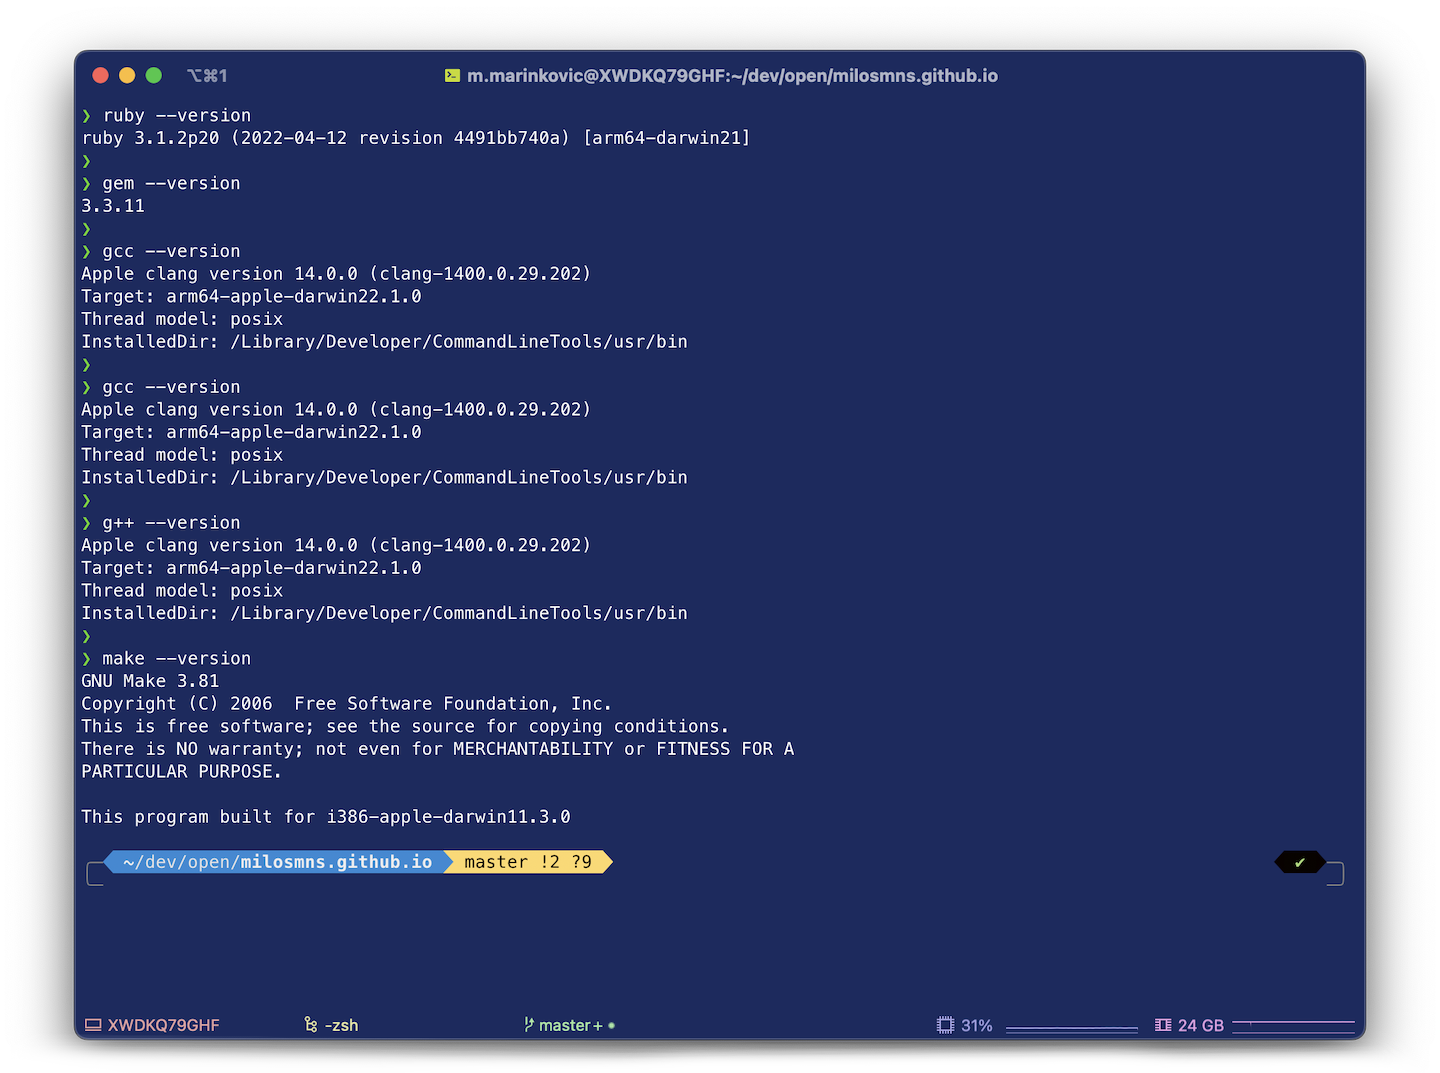 Installation requirements satisfied
If you’re sure you have everything installed, but still get the “command not found” error for these tools, it may be that your installed tools aren’t resolved in your system path. Look here to see what I’m referring to. The most common problem is that Ruby isn’t in the Path by default, which can be easily solved as well. After adding the tools to your Path, restart your command line window to apply the changes.
3 Make the changes to your website, whether it’s the layout (HTML), the styles (CSS), or the content (Markdown). You can also change the general configuration of the website by editing the _config.yml file. All these changes can be tested and verified locally on your computer without publishing anything on GitHub.
It’s still a good practice to make commits using Git (with meaningful commit messages to maintain a good change history. And of course, using Git tags is a must - if you’re happy with the state of the site, you can just put a tag there with a meaningful name (like “stable version 1.0”). If you’re unhappy with the look of the site, you can go back in history by looking up a specific tag. It’s very likely that you’ll have to use git push --force instead of git push after going back through history, as the differences between the local and remote states are too large to merge manually.
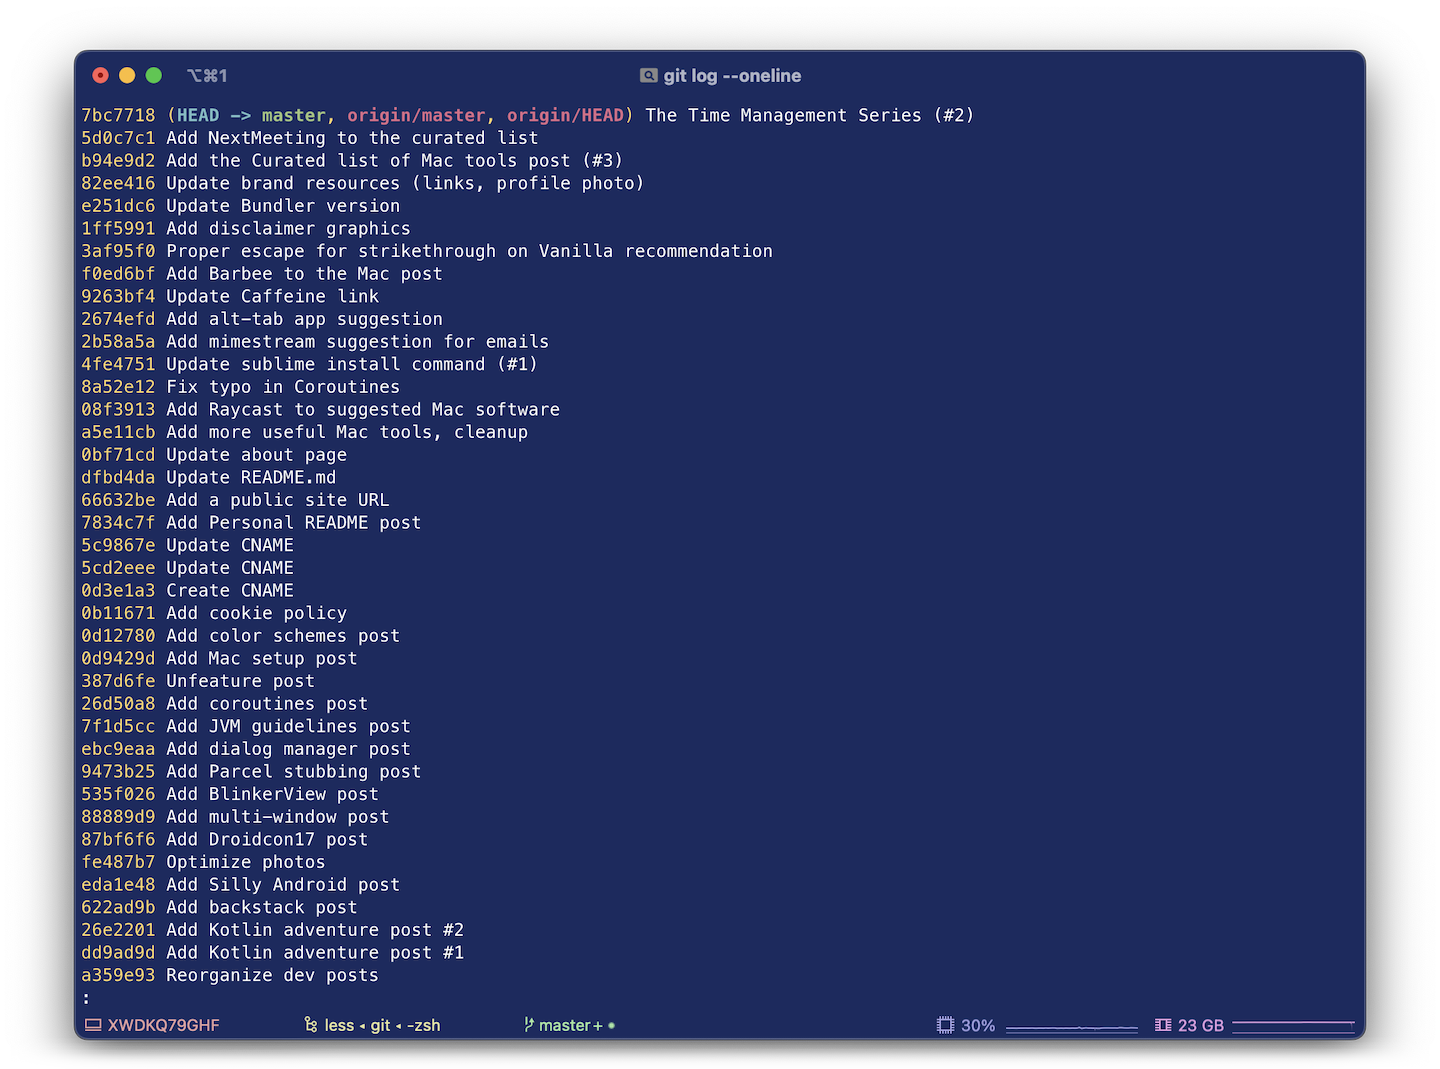 Git history of my blog
4 Run the generator locally. Jekyll collects all website resources and then generates the final static website. To do this, run the “build” command:
jekyll build
If there are problems with the configuration or the contents of the website, this command will fail with a clear error message. But a locally built website isn’t really useful unless you view it in the browser. For this to work, you have to execute the “serve” command:
jekyll serve
You should then get a link to where your site is currently running, which is usually http://localhost:4000.
 Jekyll running locally
5 The kicker: if you want to keep editing your Markdown files while serve is still running, you can instruct Jekyll to automatically update your local website! It’s called an “incremental build”, and with it enabled, you can just refresh your browser and you can see the changes immediately. Here’s how you do it:
jekyll serve --incremental
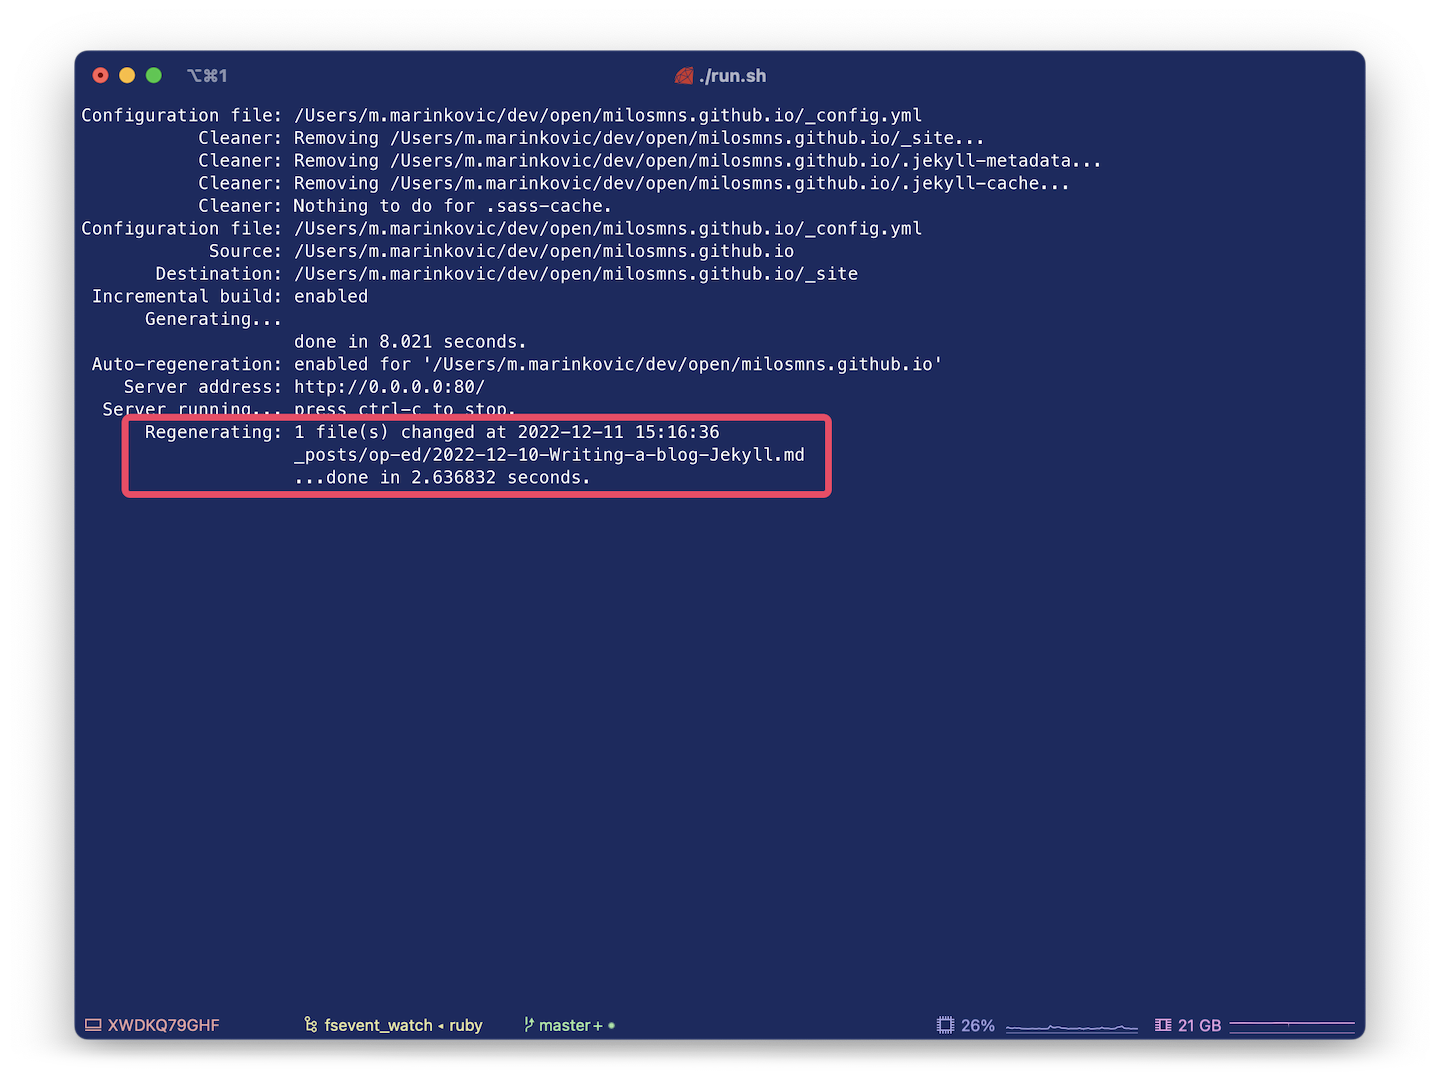 Jekyll incrementally changing the website on each change
It’s easy to forget all these commands, especially if you don’t write every day. That’s why I have a rule of making a script out of everything that’s easy to forget. In my example, I created an executable bash script that runs my website locally (sorry Windows users, it’s .bat for you).
It’s a really simple script, it’s just easy to forget.
#!/bin/zsh
clear
jekyll clean
jekyll serve --incremental --host 0.0.0.0 --port 80
open http://localhost
Here’s what that does:
serve does it first)--incremental)0.0.0.0 IP address, which is the same as localhost80 instead of 4000. Because port 80 is synonymous with HTTP, I can now go to http://localhost without the :80 suffix Jekyll blog running locally
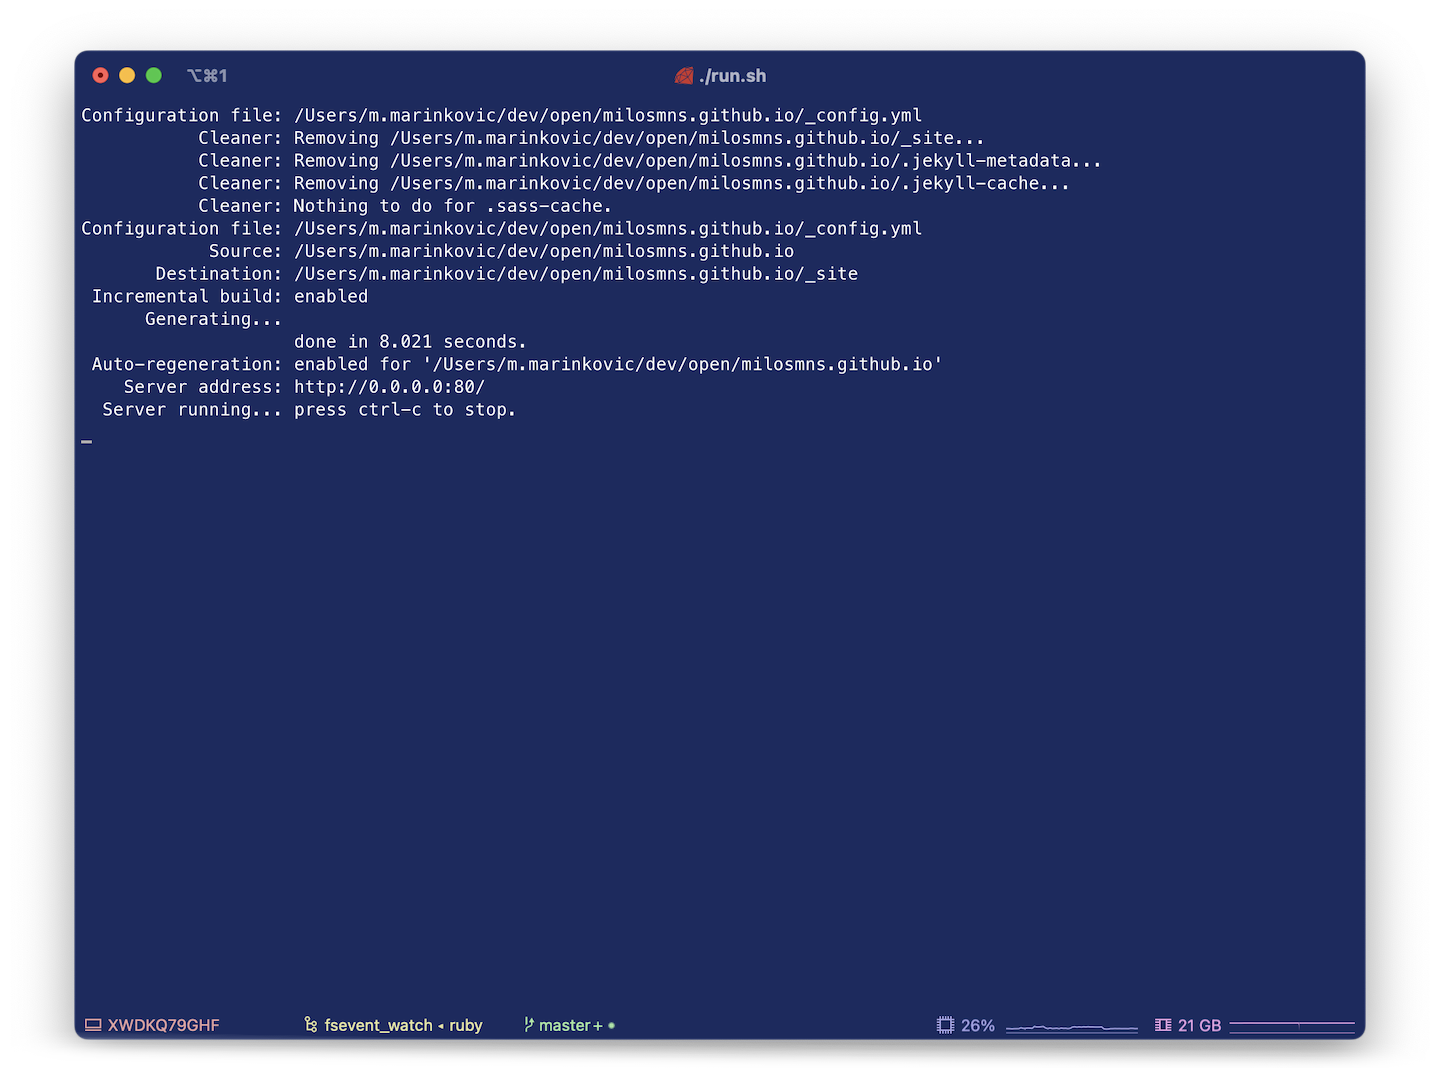
With this script ready, I auto-jump to my blog directory and run the script. After a couple of moments, my local blog is available in the browser.
j milosmns  # same as  'cd ~/dev/open/milosmns.github.io/'
./run.sh
A good recommendation for editing Markdown files is Dillinger.io. It’s a free tool that runs in your browser and gives a nice preview of what your Markdown would look like in the finished product.
Otherwise, I also often use Visual Studio Code and its GitHub variant – you know, the one that pops up when you hit . on the repository’s home page or replace .com with .dev in your repository’s URL. There’s a Markdown plugin that works nicely in there.
When you’re finally satisfied with the changes, make a normal message-commit and push the changes upstream to GitHub, as you would usually do. GitHub will check your changes one last time, generate the new static website, and finally deploy it to your-site.github.com or a custom domain (if so configured).
–
I hope this wasn’t too hard! See you on the blog. 👋
![]()
A software development experience building an autonomous AI agent using AI coding and brainstorming assistants - the benefits, challenges, and insights gained
A not so deep dive into the nuances of code readability and maintainability, examining the subjective nature of what makes code readable, weird programming languages and personal preferences
I am exploring openness, accountability, timely disclosure, robust frameworks, accessible tools, and cultural shifts that shape a transparent environment
