


This AI Agent Writes Its Own Story
A software development experience building an autonomous AI agent using AI coding and brainstorming assistants - the benefits, challenges, and insights gained

Due to the circumstances that unfolded over the past 3 months, I had to replace and set up my work laptop 4 times… from scratch. It’s seriously annoying to go through the same setup every time, and it’s easy to forget a lot of setup steps. That’s why I wanted to be smart and take notes to remind myself about all the little things I have to repeat during setups. The goal is to have the same work environment on each new machine.
This post is exactly that – a checklist for me, but also a buide for you – and you’re welcome to steal some of these ideas (I stole many myself). 😬
Open System Preferences and go through every menu and sub-menu, everywhere. You’ll see preferences that need changing.
One example of that – all of my recent devices unfortunately had an Apple TouchBar. I find it useless and laggy, and I never found myself using the extra buttons. Good old Function keys are great for me. The setting for this is in System Preferences → Keyboard → Keyboard Shortcuts → Function Keys.
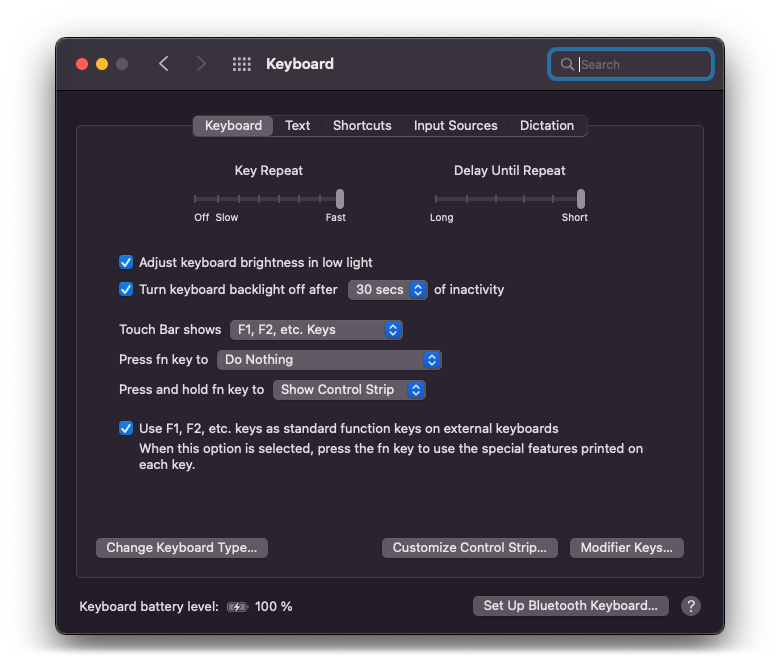 My TouchBar, disabled
Another example – I’m very used to Linux/Windows modifier keys (Ctrl, Alt, “Super”). It has always been just easier to continue with that, especially now that Apple isn’t forcing their vision around keyboard preferences anymore. Latest macOS allows you to easily swap all modifiers, even Caps Lock and the Function key. This is done through System Preferences → Keyboard → Keyboard Shortcuts → Modifier Keys.
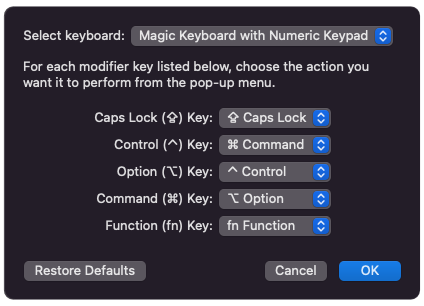 My Modifier Keys, swapped
This is the moment when I also connect my Magic Keyboard and my MX Master mouse, because the keyboard and mouse settings are per-device and not system-wide.
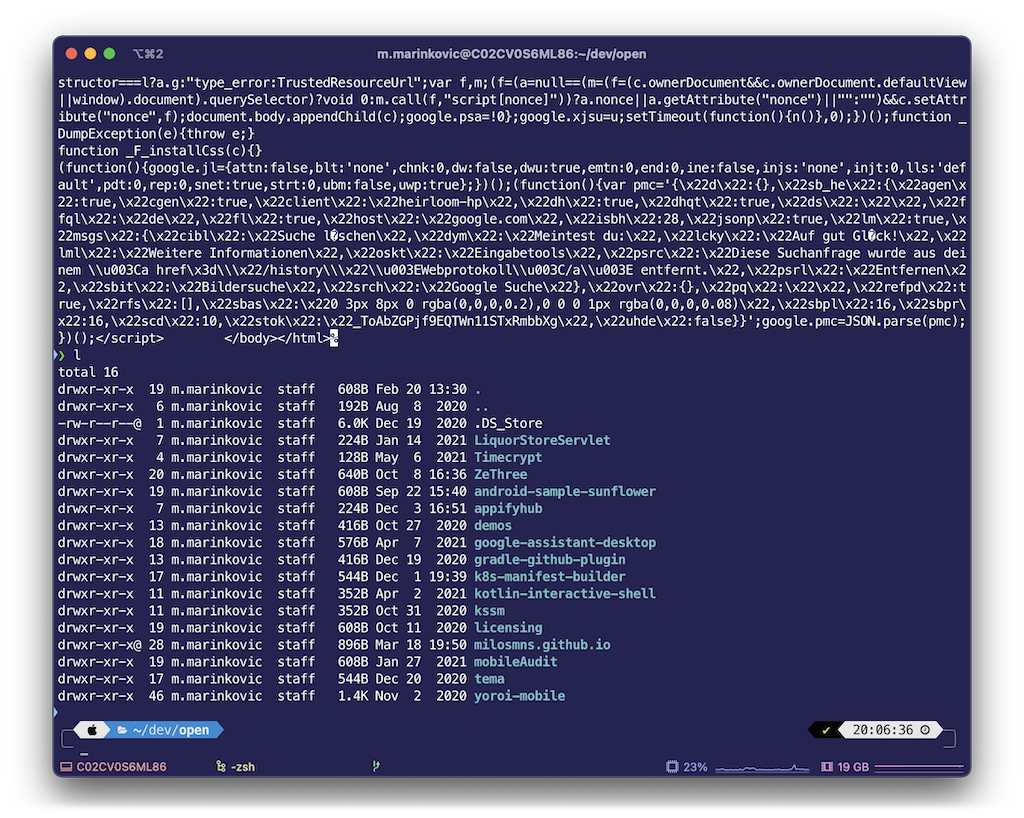 The look of my Terminal
Let’s make things easy first.
How would setting up a development environment on a Mac without Homebrew work?? It’s the “unofficial Mac package manager”, and without it, managing your installations becomes super inconvenient.
You should check the project’s homepage for the latest installation instructions. Here’s what I did from my Terminal:
$ /bin/bash -c "$(curl -fsSL https://raw.githubusercontent.com/Homebrew/install/master/install.sh)"
That’s all. Installing new software is now a breeze, simply using brew install x.
Your Mac probably already has Z-Shell (zsh) installed and set as the default shell. Z-Shell provides a better UX and more features than the basic Bash shells.
You can check this using:
$ which $SHELL # should output: /bin/zsh
$ echo $0      # should output: -zsh
If it’s there, skip to the next section.
If you’re not getting zsh there, you’ll probably want to install and set up Z-Shell now. Your default is probably Bash (/bin/bash). This Shell was the default before MacOS Catalina. With the Catalina release, Apple switched to a new default: Z-Shell. You’ll anyway still have your basic shells available in case you need them – /bin/bash and /bin/sh – but here are some reasons for why zsh is better than bash and sh.
Convinced yet? Good! Now, to install zsh using Homebrew:
$ brew install zsh
Super simple, right? Homebrew is awesome. Check out Homebrew’s author on socials too.
After installing Z-Shell, you can set it as your default shell. If you already see Z-Shell in your path (run which zsh to check), you can set it as default like so:
$ chsh -s $(which zsh)
If it’s not available immediately, it’s probably stuck in your Homebrew Cellar. Then it’s going to be something like this:
$ # This might not be 5.8 for you
$ chsh -s /usr/local/Cellar/zsh/5.8/bin/zsh
Restart your Terminal to see the changes.
You might not like editing files in the Terminal. I can take nano, but even that is often slow… so, I usually do it using a fast desktop app. My favorite text editor is Sublime Text. It’s much better than the default TextEdit app you get with your Mac.
Sublime Text also has code coloring when editing code, syntax-related completion, plugins… but I really only see it as a text editor that is also capable of displaying code – and that’s how I use it.
Downloading from the official website works, although it’s easier to maintain through Homebrew:
$ brew install --cask sublime-text
Pro tip #1: after installing, open Sublime Text and choose the Adaptive theme from the settings.
Pro tip #2: you’ll also get a subl command-line helper:
$ # How to open a file
$ subl my_file.txt

$ # How to open a project directory
$ subl Documents/project
Using grep and find to search for files from the Terminal is totally fine. Also, using cd to enter directories is fine, and ls to list the contents is fine. The same goes for sed. But all of these can start feeling very repetitive if you often go through a deep structure of directories, and they lack features for when you need to perform advanced data manipulation.
I found some nice utilities built on top of these core ideas that are (1) faster, and (2) provide a better user experience.
1. AutoJump
This one learns from your usage of cd, and gives you the ability to jump across directories with only a few characters typed. We use j to jump.
Here’s an example of what you can do with AutoJump:
$ pwd
/Users/milosmns

$ j open
Jumped to 'open-source'

$ pwd
/Users/milosmns/dev/open-source
It can also guess correctly even with simpler and shorter jump directions, like this one:
$ pwd
/Users/milosmns

$ j a
Jumped to 'android'

$ pwd
/Users/milosmns/dev/android
2. RipGrep
This tool provides really fast text search. Like, reeeeally fast.
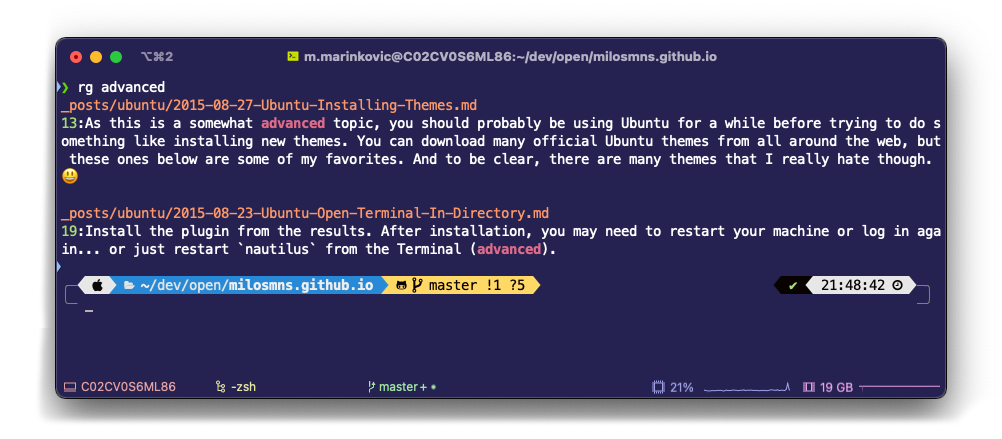 Usage of rg in a directory
In my case, it takes around 100ms to search any text through all of my projects (27 project directories, including the .git directories).
3. Tree
This tool is used for displaying deep directory structures, nicely, in the Terminal.
$ tree .how-to
.how-to
├── assets
│   ├── css
│   │   └── style.css
│   └── img
│       ├── analytics.png
│       ├── config.png
│       ├── disqus.png
│       ├── page.png
│       └── post.png
├── index.html
└── styleguide.md

3 directories, 8 files
4. FD
While find works fine, fd is a simple, fast and user-friendly alternative to it. It doesn’t aim to support all of find’s functionality 1:1, but it provides sensible (and opinionated) defaults for the majority of use cases.
$ fd mac

_posts/op-ed/2020-03-23-Preparing-Mac-Engineering.md
images/posts/keyboard-mac.png
images/posts/mac-setup-iterm.png
images/posts/mac-setup-keyboard.png
images/posts/mac-setup-modifiers.png
images/posts/mac-setup-ripgrep.png
images/posts/mac-setup-terminal.png
images/posts/work-desk-mac.jpg

$ fd --extension txt --exclude LG-WebOS-CLI

ZeBadge/zeapp/server/src/main/resources/names.txt
aimages/requirements.txt
appifyhub/charts/secrets-check/templates/NOTES.txt
code-stats/src/commonMain/resources/web/info.txt
demo.github.io/robots.txt
5. SD
Unix’s default sed (stream editor) is… well… people sometimes complain about its usability. 😝 And this tool, sd, is an arguably better alternative. It’s more intuitive and has better defaults.
Removing chars and whitespace looks like this:
$ echo '"lots((([]))) of special chars"' | sd -s '((([])))' ''
"lots of special chars"

$ echo '"lorem ipsum 23   "' | sd '\s+$' ''
"lorem ipsum 23"
Replacing text in a file or in a project looks like this:
$ sd 'window.fetch' 'fetch' http.js
Replaced in http.js

$ sd 'from "react"' 'from "preact"' $(fd --type file)
Replaced in all files
6. K9S
Do you interact with Kubernetes clusters? Kubernetes interaction using kubectl can be quite verbose, and k9s aims to make it easy, intuitive and usable. Once you enter the k9s dashboard, your Terminal becomes a modern graphical user interface!
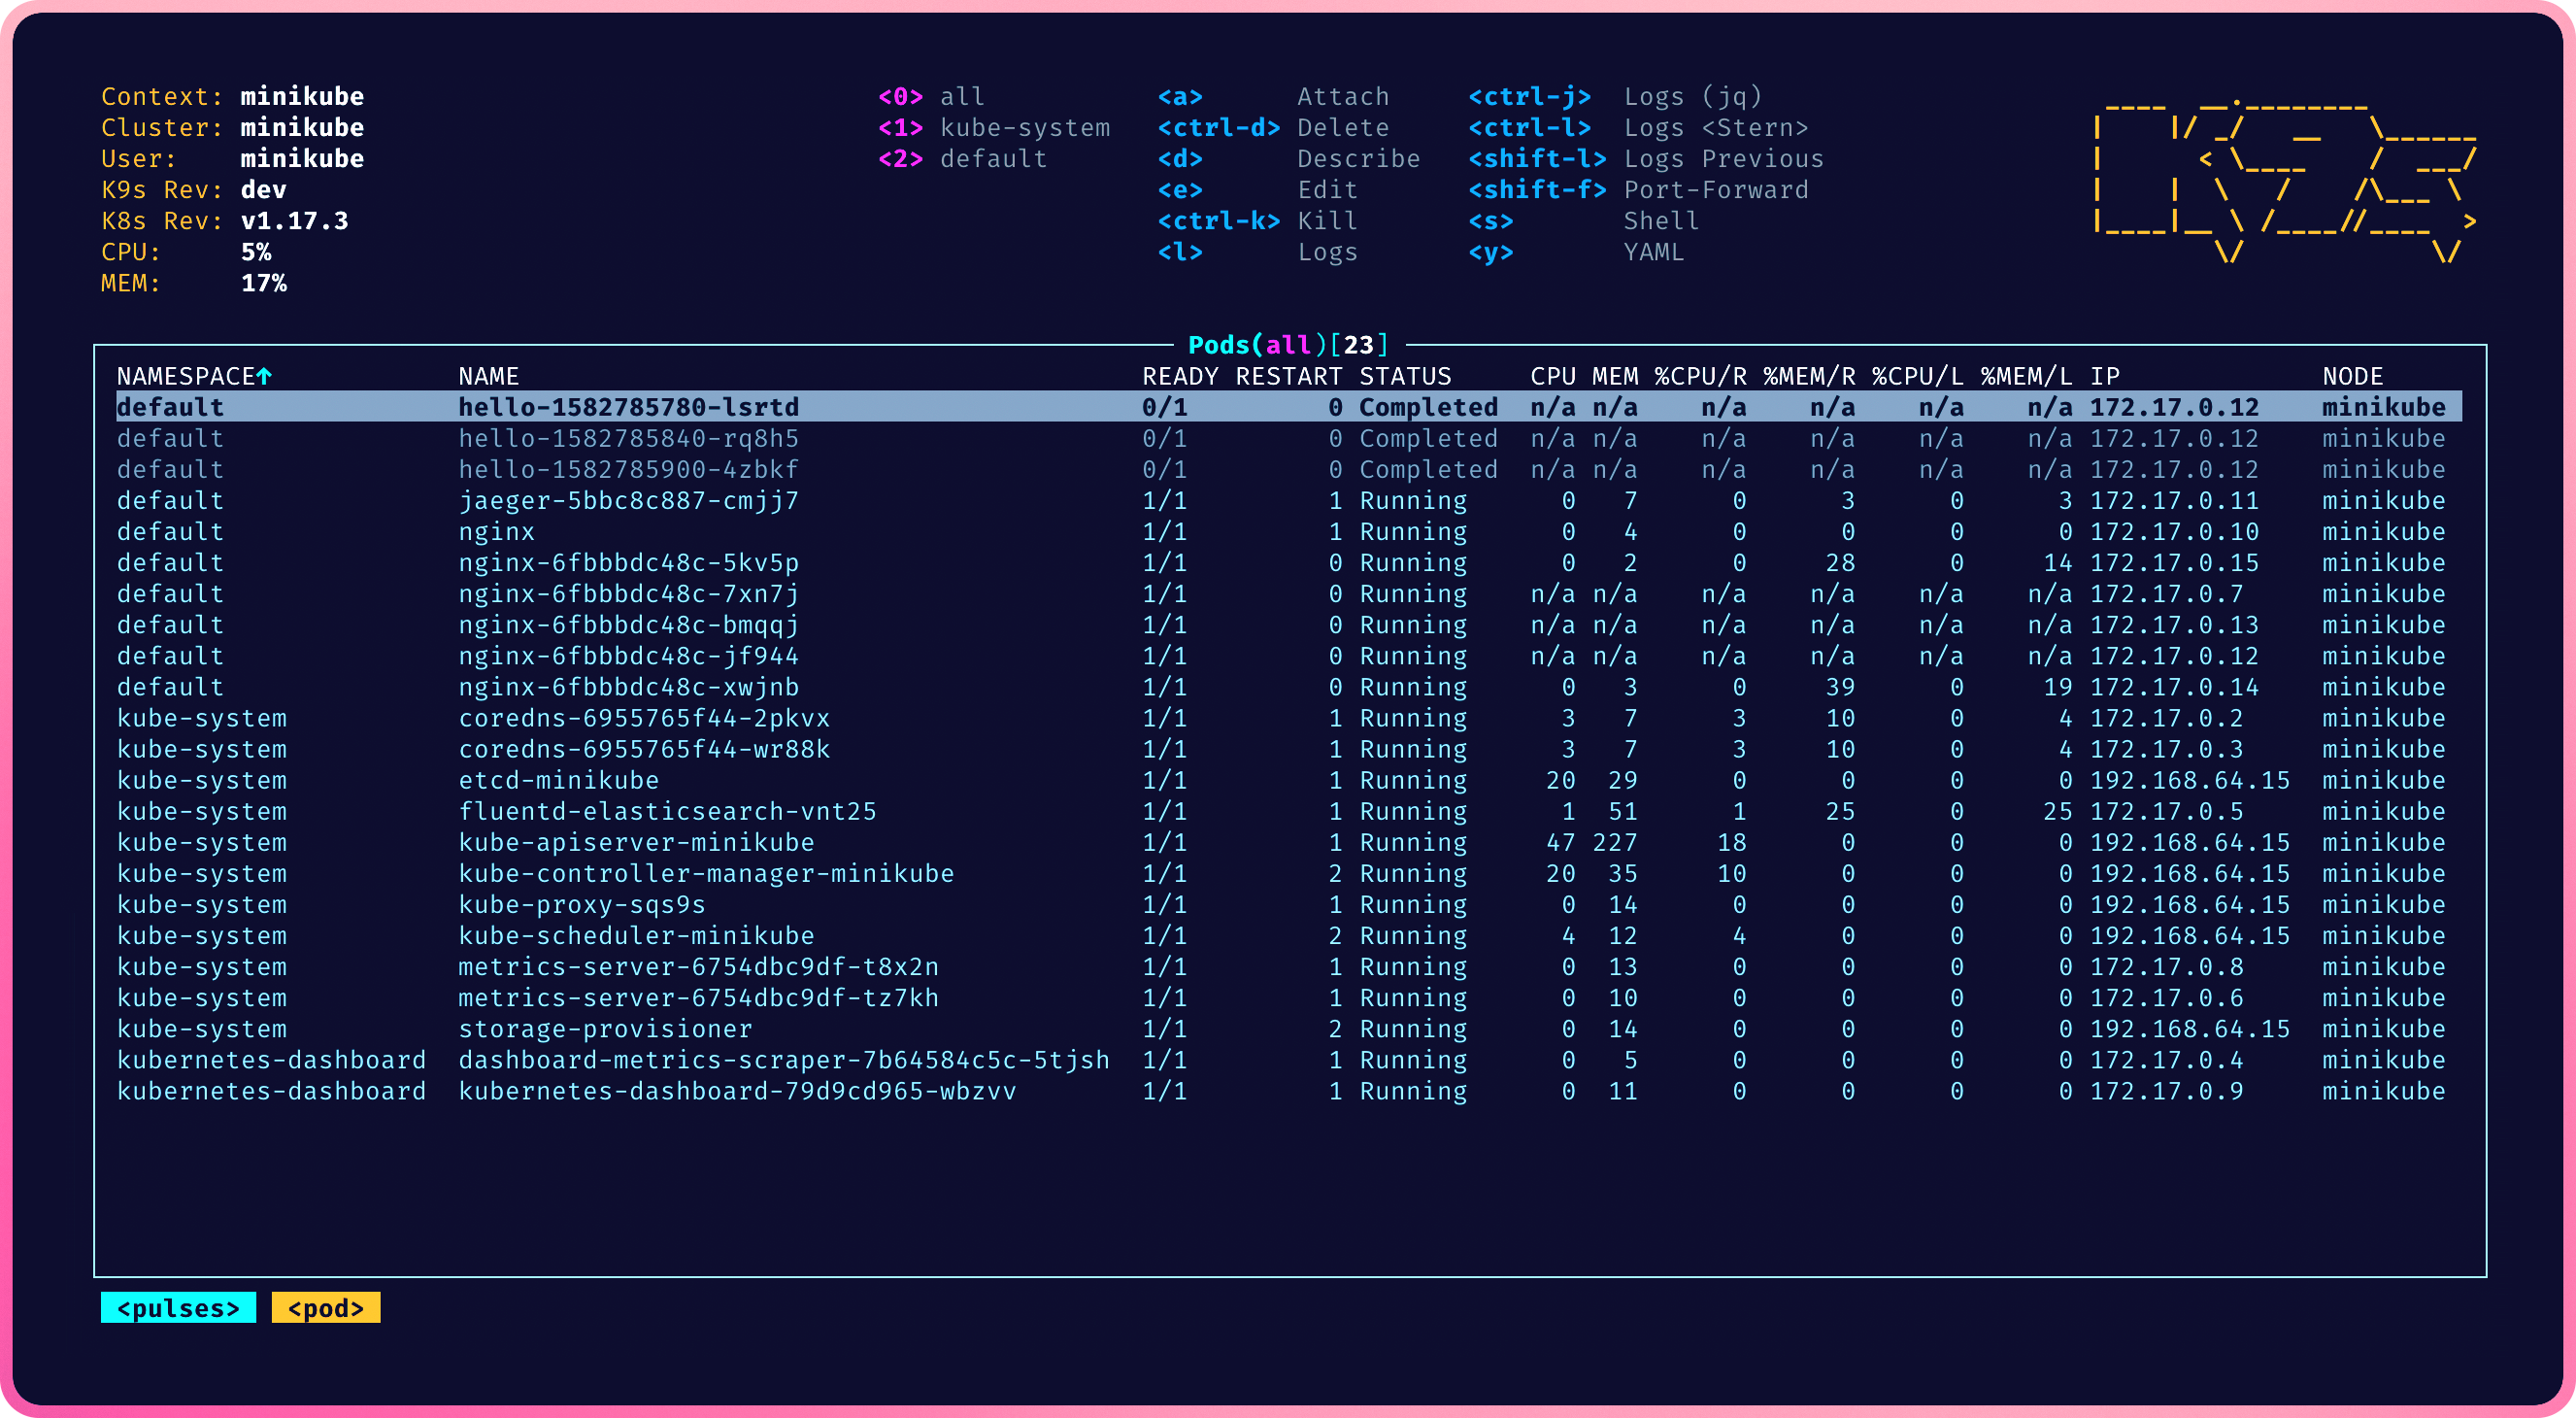 The k9s dashboard
Terminal is the main dish of this guide! It’s about iTerm, the ‘Terminal on steroids’ that does everything that your standard Terminal does, plus a bunch of other useful things you never knew you needed. It won’t make you a 10x developer, but will surely make you feel like one.
It’s super easy to install using Homebrew:
$ brew install --cask iterm2
Once installed, you should immediately open iTerm’s settings and reconfigure the defaults. For example, the best theme is not selected by default, and it’s called Minimal.
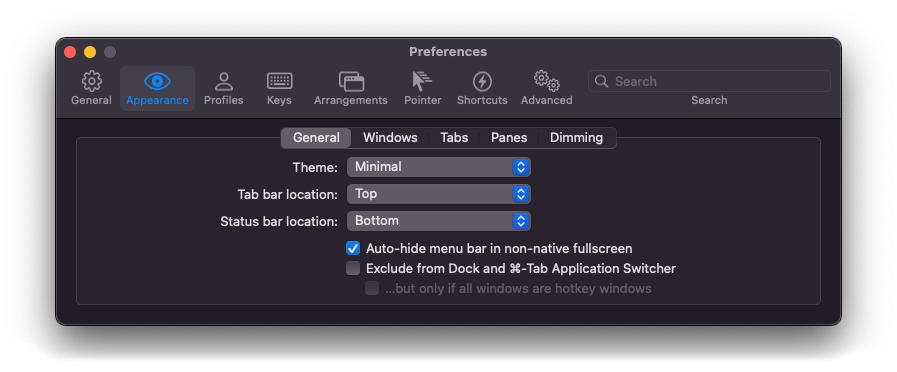 iTerm’s theme settings
You can also specify a directory where to keep your iTerm settings, in case you need to migrate everything to a new machine later.
If you want a fancy color scheme (yes – you do), check out this page. It has a lot of different configuration and schemes that you can directly import.
This is, arguably, the most interesting part of the setup. Even though it’s only a cosmetic change, OhMyZsh makes things so much cleaner and better-looking. Now it’s all about picking the right zsh theme with a few great plugins. My favorite Z-Shell framework is OhMyZsh, but there are other options like Prezto, or others.
OhMyZsh is a zsh framework that makes you feel like your doing something important. No joke. It also supports a bunch of plugins that help your productivity (or at least help with readability), as well as lots of great themes.
To install oh-my-zsh, follow the installation instructions from their landing page. I ran this:
$ sh -c "$(curl -fsSL https://raw.githubusercontent.com/ohmyzsh/ohmyzsh/master/tools/install.sh)"
You might need to restart your Terminal for the changes to take effect.
I like the powerlevel10k theme on top of OhMyZsh, as it’s nicely configurable and has support for a bunch of dev tools. Their git support is awesome, for example.
To install powerlevel10k on top of OhMyZsh, I ran this:
$ git clone --depth=1 https://github.com/romkatv/powerlevel10k.git $ZSH_CUSTOM/themes/powerlevel10k
This command pulls the theme, but you still need to specify that you want to use it. You need to change the ZSH_THEME variable value to "powerlevel10k/powerlevel10k" inside of your home directory’s .zshrc or .zprofile.
$ # Edit your shell configuration
$ subl ~/.zshrc
Restart your Terminal after this change. Follow the on-screen instructions once you open it again to set up your new theme.
You can see a bunch of other plugins for OhMyZsh here. I set my favorites in the same ~/.zshrc file, just find the plugins line:
plugins=(git colored-man-pages colorize pip python macos docker kubectl)
I usually need a JVM environment to run apps and services.
You may be aware of the Java licensing change… basically, Oracle changed their Java license, so their JDK and JRE are not commercially usable anymore. Not for free, anyway…
Update: It seems like they changed back to a free license after a while!
Regardless of the license issues, the “open” version of Java is still free for any type of use, and can be installed through Homebrew from the AdoptOpenJDK repository, for example.
To get it, I ran this:
$ brew tap AdoptOpenJDK/openjdk
$ brew install --cask adoptopenjdk8-openj9-jre-large
To be future-proof, and to make sure that all of my Java programs run with the same (default) JVM version, I specify the JAVA_HOME variable in my ~/.zshrc file. There are also some other things I configure in that file, like ANDROID_HOME, which is useful for automated processes and testing CI, as well as Android Studio’s configuration. Android SDK now comes bundled with your Android Studio installation, so you can simply point to that directory.
Here’s a trimmed snippet from my .zshrc config that sets up Java and the Android SDK, but also updates the global PATH to include all of the tools I need.
# Custom locations
LOCAL_LINKS_HOME=$HOME/bin:/usr/local/bin
SCRIPTS_HOME=$HOME/Scripts
export JAVA_HOME=/Library/Java/JavaVirtualMachines/adoptopenjdk-8-openj9.jdk/Contents/Home
export ANDROID_HOME=$HOME/Library/Android/sdk
export GRADLE_HOME=/usr/local/Cellar/gradle/5.6.4

# Here's a multi-line PATH hack!
export PATH=$ANDROID_HOME/platform-tools:$PATH
export PATH=$ANDROID_HOME/tools:$PATH
export PATH=$JAVA_HOME/bin:$PATH
export PATH=$SCRIPTS_HOME:$PATH
export PATH=$LOCAL_LINKS:$PATH
Oh, GRADLE_HOME? Did I mention that you can also install a local distribution of Gradle using brew install gradle? All your Gradle-based projects can start using the same Gradle version!
To manage my main IDEs, I use the JetBrains Toolbox with sync settings to remote repo feature turned on. You can store your settings in a private GitHub repository, for example.
My other tools and code editors are automatically updated and synchronized, so no need to worry about them.
~/Scripts directory to store all of my scripts – way I can backup and restore easily~/Library/Developer/Xcode/UserData, including the key mappings and color configurationsI recommend to also check out my Curated list of Mac tools for other ideas!
A software development experience building an autonomous AI agent using AI coding and brainstorming assistants - the benefits, challenges, and insights gained
A not so deep dive into the nuances of code readability and maintainability, examining the subjective nature of what makes code readable, weird programming languages and personal preferences
I am exploring openness, accountability, timely disclosure, robust frameworks, accessible tools, and cultural shifts that shape a transparent environment

